My husband, John, started making knives in 2017. He had always been a talented wood artist, making wooden swords and axes with ease. Let’s just say the Boy Scout’s woodcarving badge was cake for him! He enjoys making avant-garde blades for people to use, admire, and treasure.
Knife Artistry with John Dingman Knife Artistry with John Dingman Follow the life of the “Sonora” blade from beginning to end! Video Credit: Hunter Rand
John never thought about working with metal until he met with his Uncle Doug and Rod Chappel. The curves on John’s knives are unique, inspired by legendary knifemaker, Roderick “Caribou” Chappel, who I’ve written about more extensively in a previous post. They are designed to be ergonomic and artistically inspired by the curves of the womanly figure.
We wanted to take you on a blade’s journey from start, to finish. John works out of our garage in a space that is approximately 10′ x 6′. In this video you will see that he uses a commercial size (Burr King) belt grinder, bench grinder, drill press, metal files, and spindle sander in order to fashion this blade. He dreams of having a spacious workshop dedicated to his knifemaking business one day. John is heading in the right direction!
He appreciates an assortment of artwork, from blades and wood carvings, to drawings and paintings. John enjoys creating things from scratch. This is his passion, and he is striving for perfection and uniqueness in every blade.
Thank you for reading this post! I invite you to subscribe and leave a comment.
Kammi
The Sonora Knife by John Dingman This is the end product! Photo Credit: Kammi Dingman
Let’s be honest, the last thing you want is unnecessary hand blisters. Our bodies adapt to nature, just as your tools should. Did you know that in water, our hands shrivel up like raisins due to osmosis and also in order to increase our grip in wet environments? Survival is all about adaptation and performance in ever-changing environments. Maintaining homeostasis is the goal. The best knives for any environmental conditions will perform comfortably, hold an edge, and decently avoid corrosion. You can check out more important qualities to look for in a blade by reading my previous blog post. Grip matters, so here are three grip specs to look for in your next knife purchase!
1- Handle Material
The quality of handle material matters a lot to me. I prefer a decent wood, g-10, or micarta handle. Hardwoods or stabilized burl woods may be used to construct a robust knife handle with the beauty of natural wood. G-10, an exceptional performer, is a stable laminate composite, epoxy-filled woven glass fiber. G-10 is light, strong, durable, impervious to many chemicals, and resistant to changes in temperature. Micarta is very similar to G-10 and is made up of composites of linen, canvas, fiberglass, paper, or carbon fiber in phenolic resin or thermosetting plastic. Micarta is also smoother than G-10. Whatever handle you choose, make sure you like the feel and the looks!
2- Ergonomic Shape
Ergonomics is another important feature- you won’t want to use a knife if it doesn’t feel comfortable in your hand. You don’t want the knife to rub blisters on or strain your hand during use. Your hand web between your thumb and forefinger should rest on the top of the knife while your fingers wrap around the knife naturally. The fit relies on the geometry of the knife, the shape of your hand, and the working motions performed when using the knife. Ambidextrous versatility of a knife is great, but people tend to use their dominant hand for most tasks.
3- Balance
The best knives have good balance established. There is no uniform balance point, because blade shapes and lengths are all different. Some are made blade-heavy, and some handle-heavy. The balance is all about personal preference. Some of us choke up on grips, some of us sink into the back of grips depending on how light or heavy, long or short the knife is. Handle thickness (or thinness) and material also plays a role in how the blades balance. The balance also dictates where and how you apply force to do work most efficiently. Think physics (Newtons Law, etc.)
Guide to knife handle materials by Knife Informer gives a super comprehensive look at each of the handle materials and a sample knife to go along.
Here are some of the most notoriously comfortable knives with awesome handles that have honorable mentions:
That’s the tea! Every time I do one of these reviews, I see more blades that I am tempted to add to our collection. I enjoy both factory made and custom.
Thank you for reading this post, and don’t forget to subscribe. Please let me know what types of knives and handles you prefer in the comments!
Kammi
Me, casually grinding blades under the watchful eye of my husband. I always love to pick out the custom grip material. Always wear your protective gear!
Plastic sword swallowing with John Dingman! Photo Credit: Kammi Dingman
Sword Swallowers: Human Sword Sheaths
Have you ever seen a knife or sword swallowing performance? It’s a dangerous, yet intriguing art. The pointy end of the sword goes all the way past the mouth, pharynx, esophagus, and touches down into the stomach. The sword swallowing performer must suppress the gag-reflex. People have died from improperly swallowing swords. The art of sword swallowing is said to take anywhere from three to ten years to master, and only certain individuals can train their physiology to allow it.
How Do They Do It?
Some sword swallowers eat and drink a large amount before their performance so that the stomach takes on a more elongated shape that the sword can fit into better. You have to really understand the delicacy of the gastrointestinal (GI) tract and the tissues that could be accidentally sliced, punctured, scraped, or perforated. Damaged tissues could cause internal bleeding or be prone to infection. They can use stainless steel or damascus steel swords that I talked about in a previous blog post of mine, but they should be ones that are small enough to fit into the mouth and GI tract.
The Origins of Sword Swallowing
Sword swallowing was originally practiced by Indian Fakirs and Shaman priests who also exercised other interesting arts such as hot coal walking and snake charming. Sword swallowing travelled from India to Greece, Rome, China, Japan, and Europe as a new component to accompany the other traditional entertainment acts in theater and street performances. Many festivals in these countries incorporated fire breathers and sword swallowers. Indian sword swallowing advertisements first appeared in an English magazine in the 1800s and was regarded as prime entertainment. Interestingly, Scandinavians outlawed the act of sword swallowing in 1893.
Modern Sword Swallowing
29-year-old Professional Sword Swallower, Alex Magala, was winner of Russia’s Got Talent in 2014, Finalist in Italia’s Got Talent and Britain’s Got Talent, Semi-Finalist in Ukraine’s Got Talent and Quarter-Finalist in America’s Got Talent. You have to see his death defying sword swallowing performance from America’s Got Talent. That performance still gives me chills!
And that’s the tea! Thank you for reading. Please leave a comment and subscribe for more knife knowledge.
Original Wood Carvings by John Dingman
Left to Right: Battle Axe, Tai Chi Sword, Mini Master Sword, and Katana.
Photo Credit: Kammi Dingman
My husband, John Dingman, inspired me to share about wood carving artistry culture. Even before he started making knives, John has always been an avid wood carver. It was a creative outlet where he could make anything he wanted. He carved out wooden knives, bowies, neckerchief slides, walking sticks, katana, broadswords, and battle axes. I’m pretty sure he has a PhD in wood carving. A regular plain edge paring knife is typically used for wood carving. Many wood carvers may use fixed blade or folding knives depending on the situation. Palm chisels (which have specialized edges and scoops) may be used for detail work. Just like a small paintbrush for detailed painting, a long and thin knife can get into tight spots on what you’re sculpting. Understanding three main techniques and practicing good safety, anyone can start basic woodcarving! According to John, there are three main carving techniques: stop cut, v-cut, and paring cut. You use the stop cut to score a line and cut toward that line so the knife won’t go any further past it. This method is used for precision when chipping away material. The safety stops are established so that knife blade will stop at the pre-determined score. You are essentially control the depth of the cut. The next essential technique is the v-cut; A proper v-cut is performed by cutting a wedge into the wood using two diagonal cuts to create an angular indentation. Using this method is great to contour a piece of wood. Last but not least, the simple pear cut is executed like you are peeling a potato. You can pare slice out away from yourself and also slice toward yourself. Be careful when paring toward yourself because that’s where most accidents in wood carving occur.
There are books that will teach you all of the basic cuts and show example diagrams. You can also get step by step guidebooks that direct you from start to finish during your wood carving projects. Bill Burch known as “Scouting’s Whittler” of the Boy Scouts of America, made artistic caricature neckerchief slides. The crowd of Boy Scouts would gather around him while he whittled to watch as he made small blocks of wood come to life. According to my sources, it took him 20 minutes flat to make a detailed neckerchief slide. Wood carvers are few and hard to come by. Wood carving time-lapse videosby Viral Maniacs with various artists and projects let us see all of the detail that goes into making these unique pieces of art.
With wood carving it’s always important to keep your knife sharp. It’s not the sharp knife that’s dangerous, it’s the dull knife you need to worry about. The dull knife doesn’t cut very well, so you press harder, slip by accident, and cut yourself. Themain sharpening methodsand some additional honing techniques to keep your knives in tip-top shape are examined in a previous blog post of mine. When cutting with a sharp knife, cuts should be smooth and clean, with minimal effort. Always check the blood circle, with your folding knife closed or fixed knife sheathed and stick your whittling arm out to make sure that nobody is within arms reach. That way, if your blade slips, nobody else in your proximity will get hurt.
When it comes to wood carving, it’s always a better idea to use soft woods. The more minimal grain in wood, the better. If there more grain lines, it’s more difficult to cut through precisely and you may end up removing more wood than you bargained for due to the weakness of that section in connectivity to the rest of the wood. Wood carvers try to avoid these common pitfalls by planning the best way possible and adapting to the textures of the wood. To plan your project, draw a stencil or draw on the object to help create the profile. You have to really plan three dimensionally. Safety is dramatically increased by wearing a Kevlar glove in your holding hand. The Kevlar glove should be the first thing you purchase if you want to begin wood carving. If you can help it, always cut away from yourself. John advises to always have a first aid kit nearby and wear your Kevlar, as his many hand scars illustrate the accidents he experienced throughout his artistry. We can really appreciate the hard work that goes into these rare and eclectic artistries.
Thank you for reading! If you enjoy wood artistry, knives, and the great outdoors, I invite you to subscribe and leave a comment.
My great-grandfather was a kind and simple Oklahoman man. Although I was born after he had passed away, I know he was just like my grandmother who raised me: a hard worker and good advice giver. He had a small knife collection of humble necessities. A collection can be unique and interesting, no matter how big or small. His treasures have been passed down from my grandmother, to my mother, to myself. This post is about his every day carry (EDC) knives, which he cherished. It’s important to have a good EDC knife, which I have written about along with my recent selection process experience in a previous blog post.
There are mostly elegant cream and bone colored knives in his collection. The handles are made from plastic composites, micarta, and wood. One of the most interesting knives in his collection is a 1950’s vintage 7″ Colonial Shur-Snap Cream Sabre Ground Blade Fishtail Automatic Switchblade Knife. I think this one must have been his favorite according to the telltale wear and tear on the blade. Another knife in his collection is a 4″ small version of the French Chatellerault Stilleto Fishtail Knives produced in the 1950’s to 1960’s. Although more of a novelty-type knife, it gives off a dainty and elegant aura. Another favorite of his was the Disneyland multi-tool. Multi-tools always come in handy, so the Disneyland collectors edition (which bears a resemblance to a short and compact swiss army knife construction) is a very useful utility knife for any gentleman. Last but not least, he has a well used Old Timer which bears resemblance to some case knives. Cabela’s still sells Old Timer knives with their vintage design! See how Gentleman’s knives have updated their image in Blade Magazine article by Dexter Ewing.
These knives led meaningful lives of daily utility and had a home in my great-grandfather’s pocket. A gentlemans knife is usually stored in their shirt/jacket or pants pocket and used daily. You can tell that my Great-Grandfather loved every gift that my Grandmother (his daughter) gave him by the way he held her gifts close to his heart. If any of you know my Grandmother, she has the best taste in all things décor, clothing, and style. This collection shows me that she is also an expert EDC knife picker!
The purest form of knife collecting is all about the sentimental value of your pieces. If something speaks to you, you should do your research, buy it at a good price and add it to your collection. Many knives appreciate in value if they are kept in good condition or if the custom maker passes away. Of course, this depends on who or what company made the knife, what materials its made out of, how large it is, and how exclusive or common it is. “There never was a good knife made out of bad steel.” – Benjamin Franklin
If you enjoyed the content in this post, please subscribe for updates and leave a comment!
Kammi
My Great-Grandfather’s special knife collection.
Photo Credit: Kammi Dingman
Organic meat beats the hormone pumped alternatives any day. That’s why I support hunting and conservation. Once you receive your hunter’s safety certificate, you are able to purchase a hunting license and tags either through a raffle system or over-the-counter. In Nevada, we have a raffle system. There are different types of game to hunt from small to large. For big game there are various seasons such as muzzle-loader, archery, and regular rifle seasons.
My brother is actually the one that got me into archery and hunting. He taught me how to shoot a BB gun, 22 rifle, and bow. I find the most enjoyment in doing archery for target practice. Arrows are basically reusable ammunition that last for a while. Archery is more difficult than rifle due to the close range you must be within to harvest the animal. Regardless of the method chosen, a field kit is a necessity for your hunting pack. Even a simple, but good knife can make a difference.
A decent field kit is a must. It will allow you to properly process the animal to the point where you can efficiently transport it to your campsite or kitchen for consumption or freezer storage. Listed are the components of a field dressing kit: caping knife, skinning knife (which may have a gut-hook), boning/fillet knife, bowie knife, wood/bone saw, and game shears. The first three types of knives (caping, skinning, and boning/fillet) are very essential and are the base of most kits. The purpose of a field kit is to essentially be as efficient as possible when processing the game. A variety of tools with plain edges and serrations are used. Here is a review of some popular field dressing knives by James Johnson from outdoorhunt.net.
There are new advancements in field dressing equipment such as the Havalon series of knives. Each time the blade dulls, you are able to easily switch out the old scalpel for a new one. If interchangeable parts aren’t for you, sharpening your blades in advance and packing a field guided sharpening kit for on-the-go sharpening should do the trick! Check out this previous blog post of mine for tools and tips on sharpening your knives!
If you enjoy hunting and the great outdoors, please subscribe and leave a comment!
Kammi
Polished damascus steel knife by John Dingman made for our friend, Blaine. Photo Credit: Kammi Dingman
We have experienced false Spring, second Winter, and will be slowly transitioning to Summer here in Nevada. As things begin to warm up, BBQ or smoked meat and veggies sure hit the spot. When camping, taking a hardy knife will make the task of cooking a lot easier. If you don’t want to take your fancy chef’s knives from home, you can invest in a decent cooking all-around camp knife, which I talk about in a previous blog post, or knife kit that will aid you in your food preparation tasks. If you do want to bring your nice knives to the outdoors, just be aware of the rusting that the environment inflicts on the steels with higher carbon content.
From onions and meats to twine and sticks, the robust camp kitchen chef’s knife will perform and prove its worth in more than just the camp kitchen activities. Chef’s knives are the bigger and more robust knives in the kitchen. Rubberized handles make it easier for you to clean and sanitize the knife between tasks. After your adventure, these blades can usually be put in the dishwasher to deep-clean and sanitize at high temperatures. Let’s not underestimate the usefulness of a good camp kitchen paring knife. Paring knives are smaller knives that are great for peeling skins in addition to chopping fruits, vegetables, cheese, and sausages. I would also greatly recommend bringing tin foil and a pair of tongs to pull things off of the grill or fire so that you don’t burn your hands during your outdoor cooking experience.
Of course, we can take our nice cutlery to the wilderness, but we shouldn’t expect some of the indoor oriented knives to perform well in the conditions of the environment. For instance, some blades like the Japanese carbon steel gyuto knives require really stringent drying and maintenance, otherwise the blade will rust. Also, the patina must be maintained for aesthetics. Chef’s knives constructed from stainless steels are the much lower maintenance option that are better for the outdoors. Wusthof, Zwilling J.A. Henckels, and Shun have great options for everyone. I’ve owned a lot of cooking knives and I really enjoy the Wusthof brand.
Camp kitchen cutlery knife sets are reviewed from Gerber Freescape Camp Kitchen Kit ($35 on Amazon), GSI Santoku Knife Set ($35 on Amazon), and Opinel Nomad Cooking Kit ($85 on Amazon) in a post written by Cameron Martindell from Gearjunkie.com. Some even come in hard cases that are designed to double as cutting boards. When you’re on the go, sometimes you’re in your car and in between destinations. It’s much easier to make a sandwich or prepare a good snack with a trusty camp kitchen set that was born for the job! Multi-utensils, like those made by Light My Fire, are great because they offer the knife, spoon, and fork all-in-one ($10 for four on Amazon). Don’t forget the java with the portable AeroPress Coffee and Espresso Maker ($30 on Amazon). Happy outdoor cooking!
If you enjoyed this content, please share this post with someone who enjoys cooking and the outdoors!
There’s nothing like a trip to the great outdoors to put you in good spirits! With nature all around you, fresh air, greenery, and wildlife is abundant. No matter what the season, the environment is harsh if you do not have the right tools. Amongst the most important tools to bring with you on a camping trip is a camp knife. In fact, some people bring a variety of knives such as a camp knife, hatchet, fish fillet knife, multi-tool, and a mid-size survival knife.
A decent camp knife is usually an all-in-one versatile knife with extreme durability. Camp knives generally have a blade at least 5 inches in length and can have a full-tang or hidden-tang handle. Campsites are dirty and you can imagine how grimy and dull a knife will get after repeated usage. I strongly recommend packing a pocket sharpening tool (I like Work Sharp Guided Field Sharpener) for proper blade sharpening on the go!
Camp knives can be used for batoning (splitting wood), cut tender, prepare food, notch poles, and other common camp-oriented tasks. Ergonomics are very important in the wilderness, so it’s vital to make sure that the knife you are purchasing is comfortable for your hand. Features like jimping (little groove cutouts for the thumb on the back of the blade) can provide increased control. Serrations are another factor to take into consideration; knives can be partially or completely serrated. Although they can be used like a saw to gradually slice through thick objects, the cuts are less clean than plain edge knives. Knives with partial or full serration are also more difficult to sharpen than plain edge blades. Blade HQ experts provide a review of some popular camping knives.
Camp knives demonstrate more strength during big tasks versus their smaller pocket knife counterparts. They are usually fixed blades, but can also be folders with more robust construction. Liner lock knives are not recommended for activities such as batoning as they usually buckle up and can injure the user. Also, just because it’s a burly camp knife doesn’t mean it can’t be pretty. I prefer a plain edge with mirror polish or stonewash finish. Knives can be easily stored in a leather or kydex sheath that attaches either on your belt loop or the side pouch of your backpack.
Thank you for reading this camping knife blog post and please let me know what kinds of knives you take camping in the comments below! If you like this content, please don’t forget to subscribe.
Kammi
Camp knives from John’s collection. Photo Credit: Kammi Dingman
I enjoy watching my husband make knives using the stock removal method. Stock removal means that you are essentially carving out a knife and removing the excess metal from a slab. First, he begins by drawing blade designs on paper, and after some amendments, cuts out the shapes using plexiglass (acrylic glass). Always save your plexiglass blade figure for your portfolio. Then he traces the image in marker and profiles out the knife from the steel stock.
Once the knife has the desired shape, it’s time to drill holes for pins and grind into the steel to actually thin the knife out. John creates a hollow grind on his blades using a Burr King grinder. Rough grits should be used first to shred away a majority of the metal. Once the blade is properly ground, it’s time to heat treat it. This is the procedure where the steel gets hardened. Various steels have different heat treating protocols. Hardness can be tested using the Rockwell scale.
After heat treating, knives are ground using fine sandpaper grits and polished up using a polishing wheel and compound. We can also engrave dates, names, and logos onto the blade. If John is making a full-tang and using scales for the handle, he proactively anticipates the location of the pins and how much material he will need in order to shape the handle. After a lot of sanding and testing the grip, he sharpens the blade. Sharpening is the last step and should be carefully performed. My previous blog post, Looking Sharp, discusses the popular sharpening methods used in this stage.
There is a helpful knifemaking article published on Blade Website by Wayne Goddard called Knifemaking 101- Read This Before You Make a Knife. The article addresses how to set up shop and advises on what materials to use. Whether or not you’re a prospective bladesmith, this literature is a fantastic read. Thank you for reading and please share and comment if you enjoy the artistry of knives!
Kammi
Epoxy step for a custom hidden-tang knife.
Photo Credit: Kammi Dingman
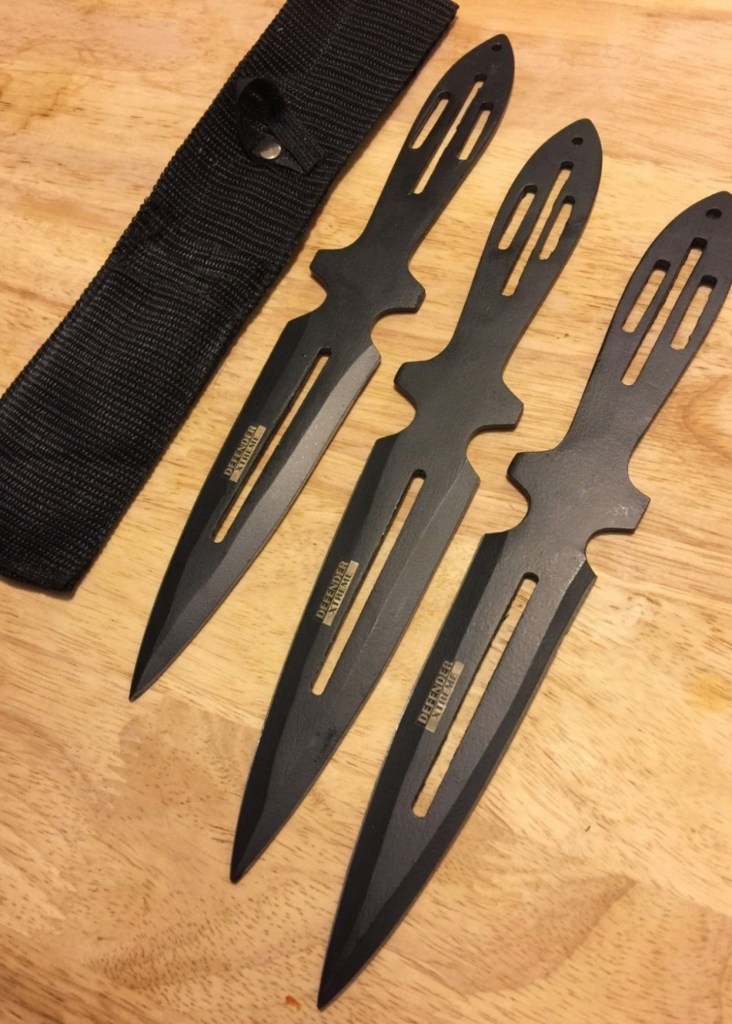
Despite common beliefs, throwing knives are actually not very sharp. Throwing knife dullness decreases the risk of self-injury and helps with sustainability of the blade edges. Throwing knives do not usually have bulky handle grips as they get in the way of aerodynamics and technique. The knife thrower may have to hold or touch the blade during the performance of some throwing techniques. They are also somewhat heavy and robust for their size compared to other knife types, which has to do with balance and durability. Usually composed of stainless steel or some other carbon-based steel, a weight of 300g for a throwing knife is recommended. Stainless steel, although pricier, is better quality than the more carbon-based steels. There are even boot knife models that are built for throwing and concealability available for purchase. Wood, cardboard, or other foam materials are used to absorb the impact of the knives during practice. The talent of throwing knives is definitely an underrated art. Form is important when hurling a knife, much like in archery. Balance and back muscle recruitment is the key in executing a precise throw.
Japanese kunai knives were originally made for farming purposes and were used as hand shovels. The kunai were made out of unhardened (not heat treated) and unsharpened metal. The hole on the top was originally for finger stabilization while turning up crops. Animes and mangas like Naruto romanticize the usage of kunai knives in throwing and stabbing. Let’s not forget the flashy shurikens! Shurikens also called “throwing stars” and “hidden hand blades,” were used by Japanese samurai and ninjas to distract their opponents. These shurikens were fashioned from the old tools available in the village. Throwing stars were sometimes dipped in bacterial substances to fatally wound opponents.
Here are the Top 10 Best Throwing Knives of 2019- Reviews by author Scott Webb. He also points out what key qualities to consider while shopping for throwing knives, such as aerodynamics, ease of use, and the price tag. Let’s examine the main pros and cons of throwing knives and shurikens. The pro is that you can use either a throwing knife or shuriken to stun a target and close a distance gap. The con is that once you throw your blade, you instantly lose your weapon! There’s also the fact that you can’t always anticipate the penetration that the throwing knife will achieve upon striking the target.
Thank you for reading and please share this blog post if you enjoy this content!